
Whitelabel Appearance
Configuring the Appearance of Your White Label Booking Site
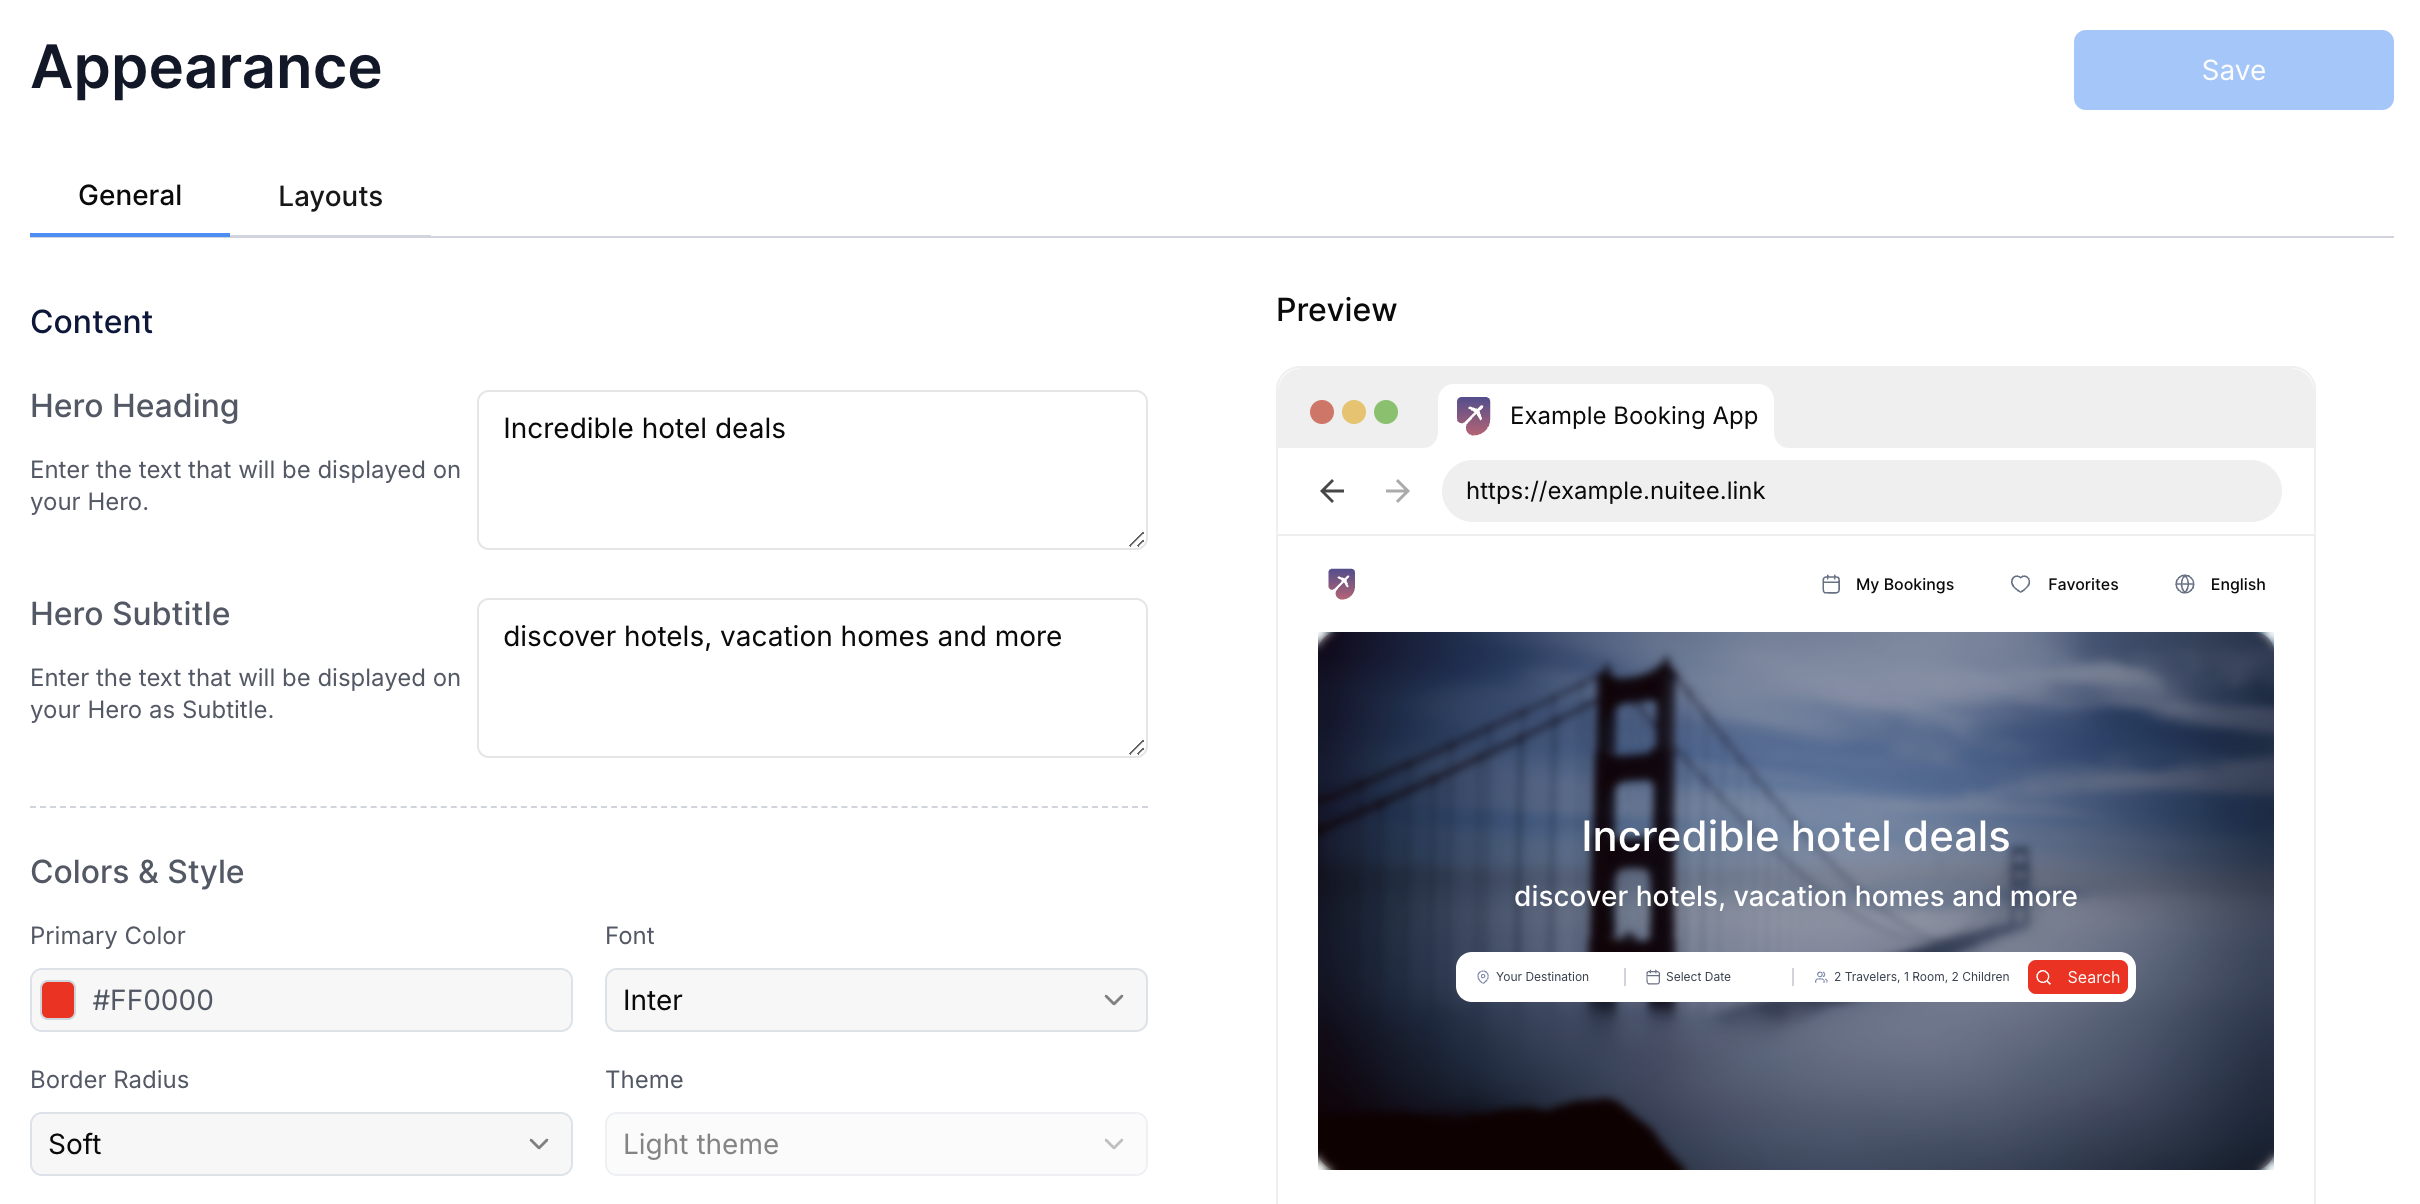
This guide will walk you through the Appearance tab in your White Label configuration. This section allows you to tailor the look and feel of your booking site, ensuring it reflects your brand’s identity and vision.
Content
Hero Heading
This is the large, bold headline on your homepage hero image (e.g., “Incredible Hotel Deals” in the example below). Enter the text that will serve as the primary message for your visitors. Keep it short and impactful.
Hero Subtitle
This is the smaller text that appears below the hero title, providing a more detailed message or value proposition (e.g., “Discover hotels, vacation homes, and more” in the example below). Enter the supporting message for your hero title, ideally keeping it concise but informative.
Colors & Style
In this section, you can customize the overall aesthetic of your site, including the primary color, button design, and font selection.
Primary Color
This is the main color used throughout your site for buttons, links, and other key elements. Select a color using the color picker or enter the hex/rgb code for your desired primary color.
Button Radius
This setting allows you to control how rounded your buttons are. A higher number will result in more rounded buttons, giving a softer, modern appearance. Use the + or - buttons to adjust the corner radius of buttons. Set the radius to your desired appearance (e.g., 0px for sharp corners, 10px for slightly rounded, etc.).
Font
This font is used for your site. The right font can enhance readability and set the tone for your brand.
Theme
This feature is still in development at the time of this writing, but soon you will be able to choose themes that will help define the look and feel of your booking site..
Images
Here, you upload the essential visuals that define your brand’s identity. Make sure your assets (logos, hero images, etc.) are high-quality and within the size limits specified. For each of these options Click the + icon to upload your image in SVG, PNG, JPG, or WEBP format (max size: 5MB).
Color Logo
This primary logo should use color and will appear on light backgrounds across the site. Recommended size: 360 px wide (SVG preferred for best scaling).
White Logo
This white version of your logo will be used when it needs to appear on dark backgrounds. Recommended size: 360 px wide (SVG preferred for best scaling).
Hero Image
This is the primary visual that users will see on your homepage, displayed prominently behind the search bar. Recommended size: 1200 × 600 px (landscape orientation).
Favicon
The favicon is the small icon that appears in browser tabs alongside the page title. This should be a smaller version of your logo or another recognizable symbol of your brand. Common sizes: 16 × 16 px, 32 × 32 px, or 48 × 48 px (ICO or PNG format recommended).
Final Step: Save Your Appearance Configuration
Once you’ve made all your adjustments, click the Save button in the top right to apply the changes to your site. The updates will be reflected immediately on your white label booking platform, ensuring a cohesive and professional look that aligns with your brand.
Review Your Changes:
After saving, visit the front end of your site to review how the adjustments to images, style, and text appear to your users. Fine-tune these settings as necessary to achieve your desired appearance.
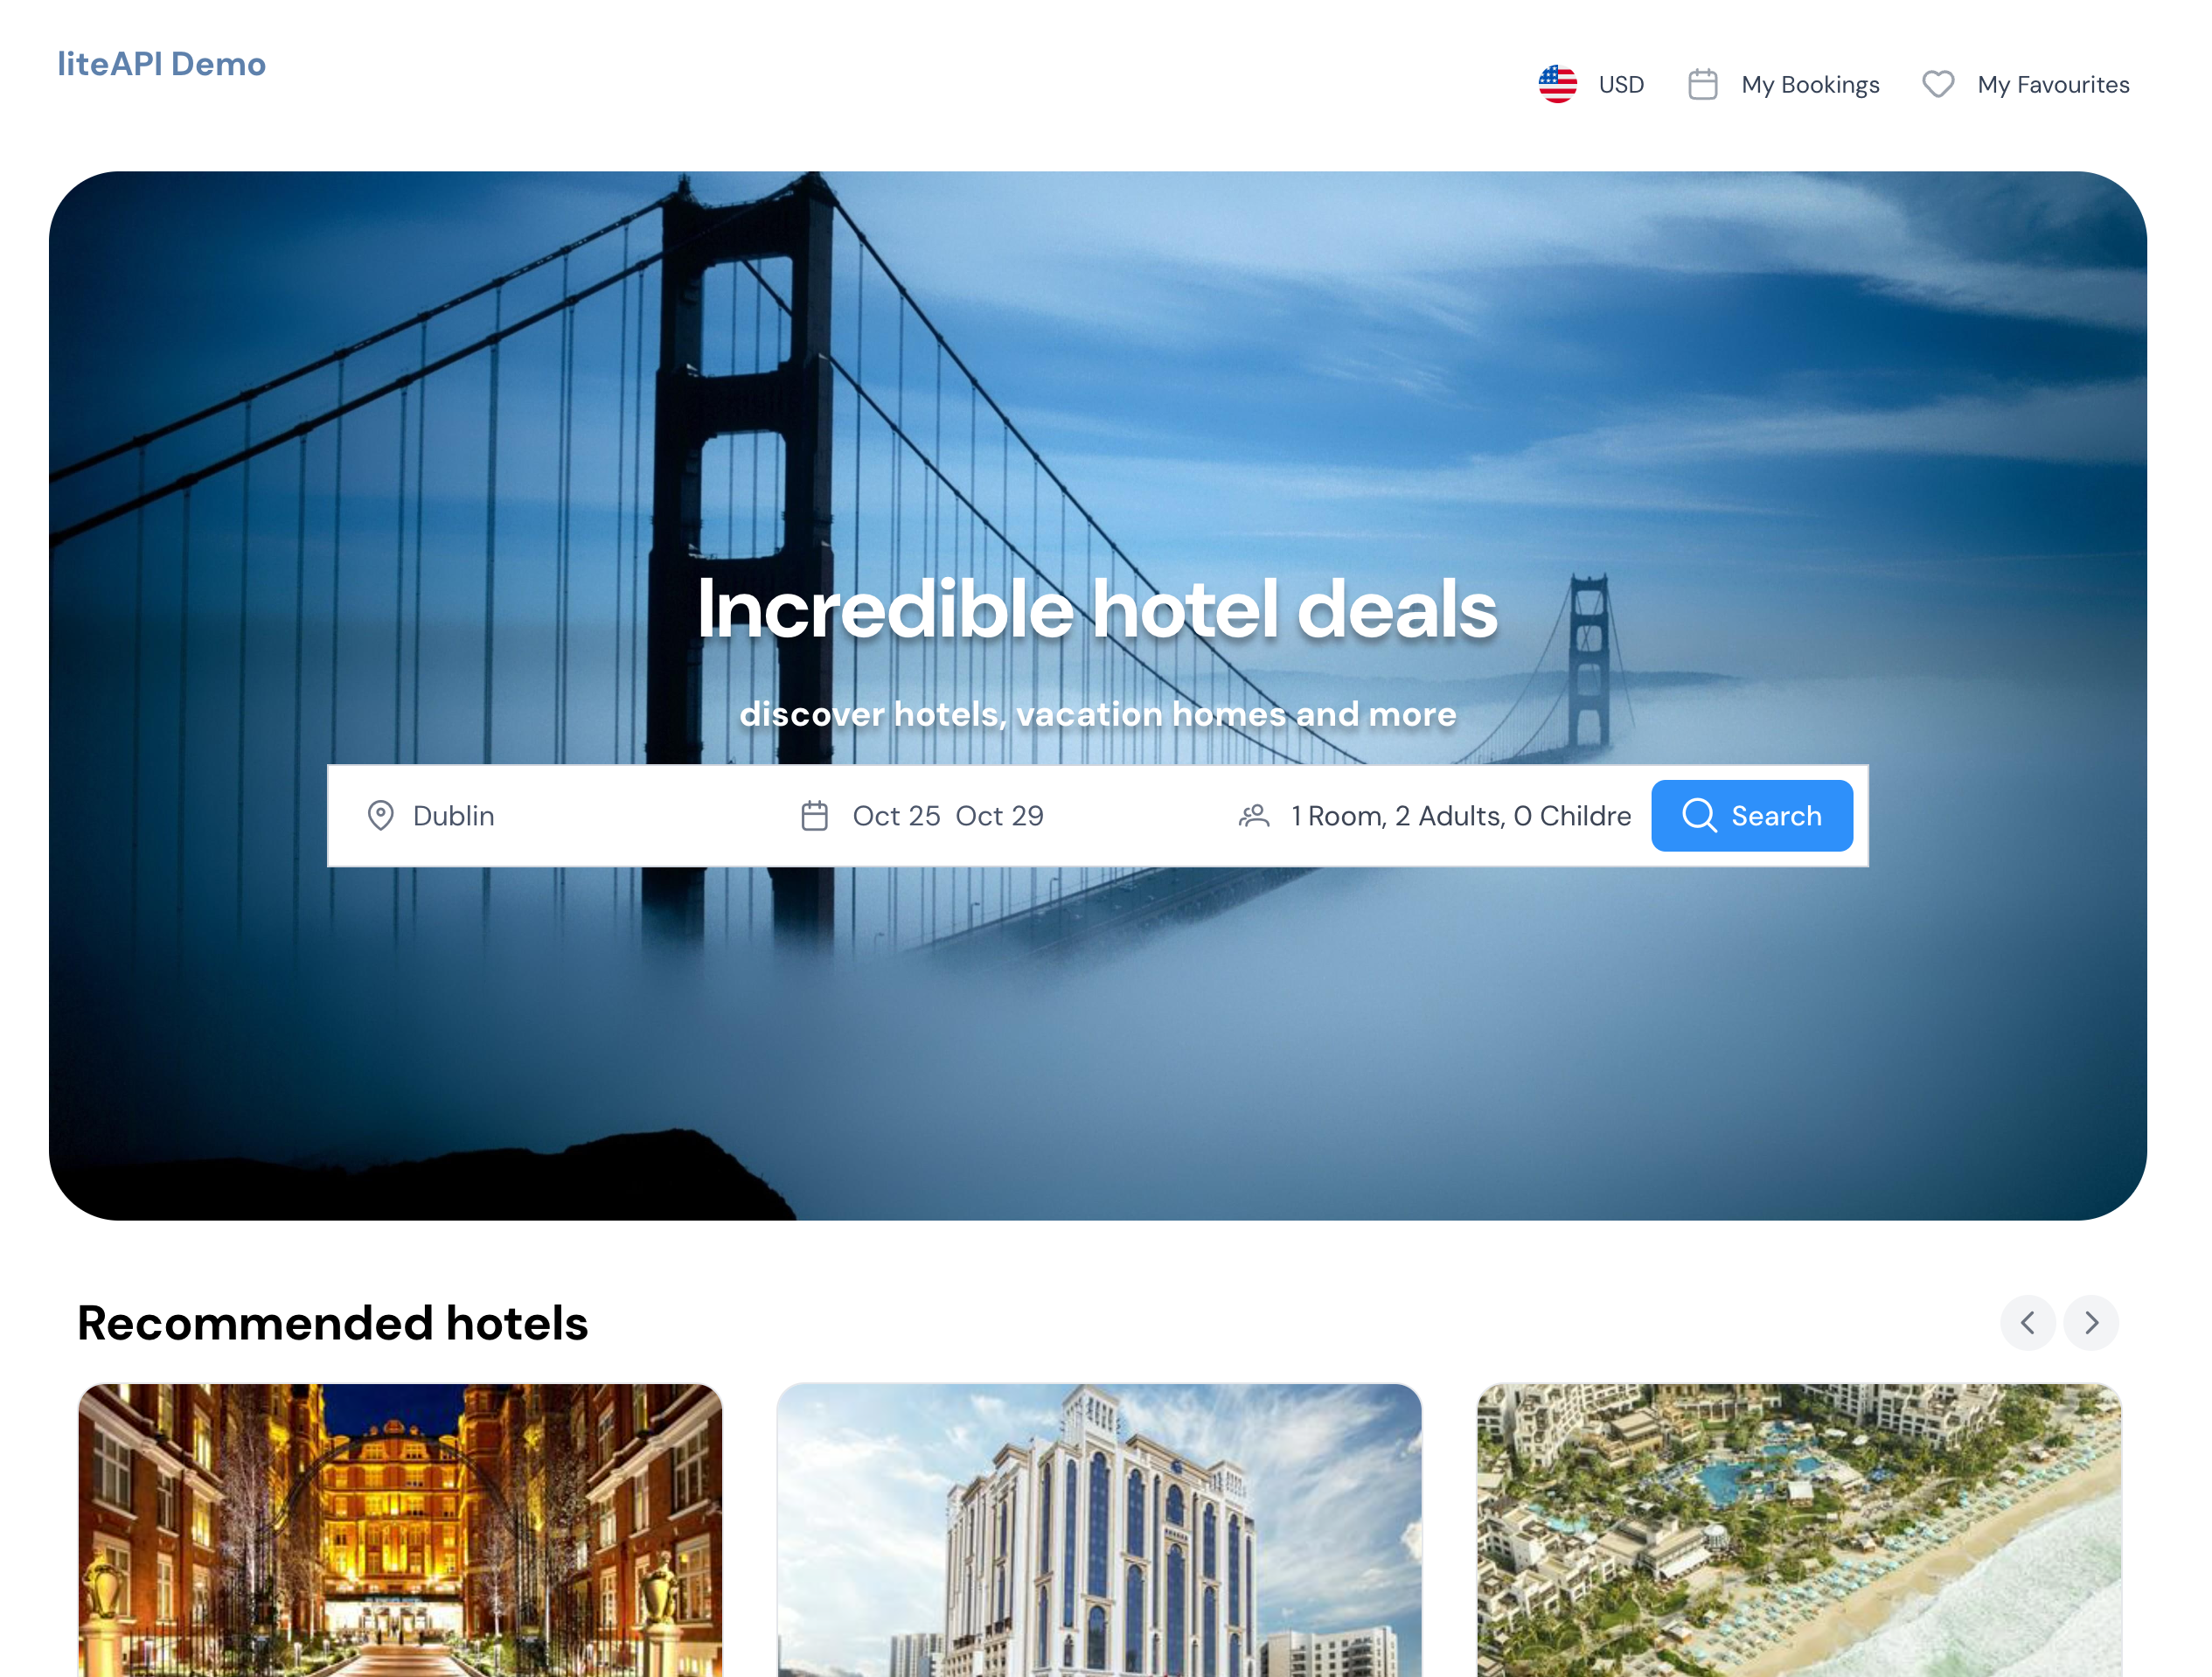
See your changes reflected immediately on your White Label site after saving.