
Step 4: Booking a Room
It is now time to book the room. We will use the BOOKING endpoint to do so.
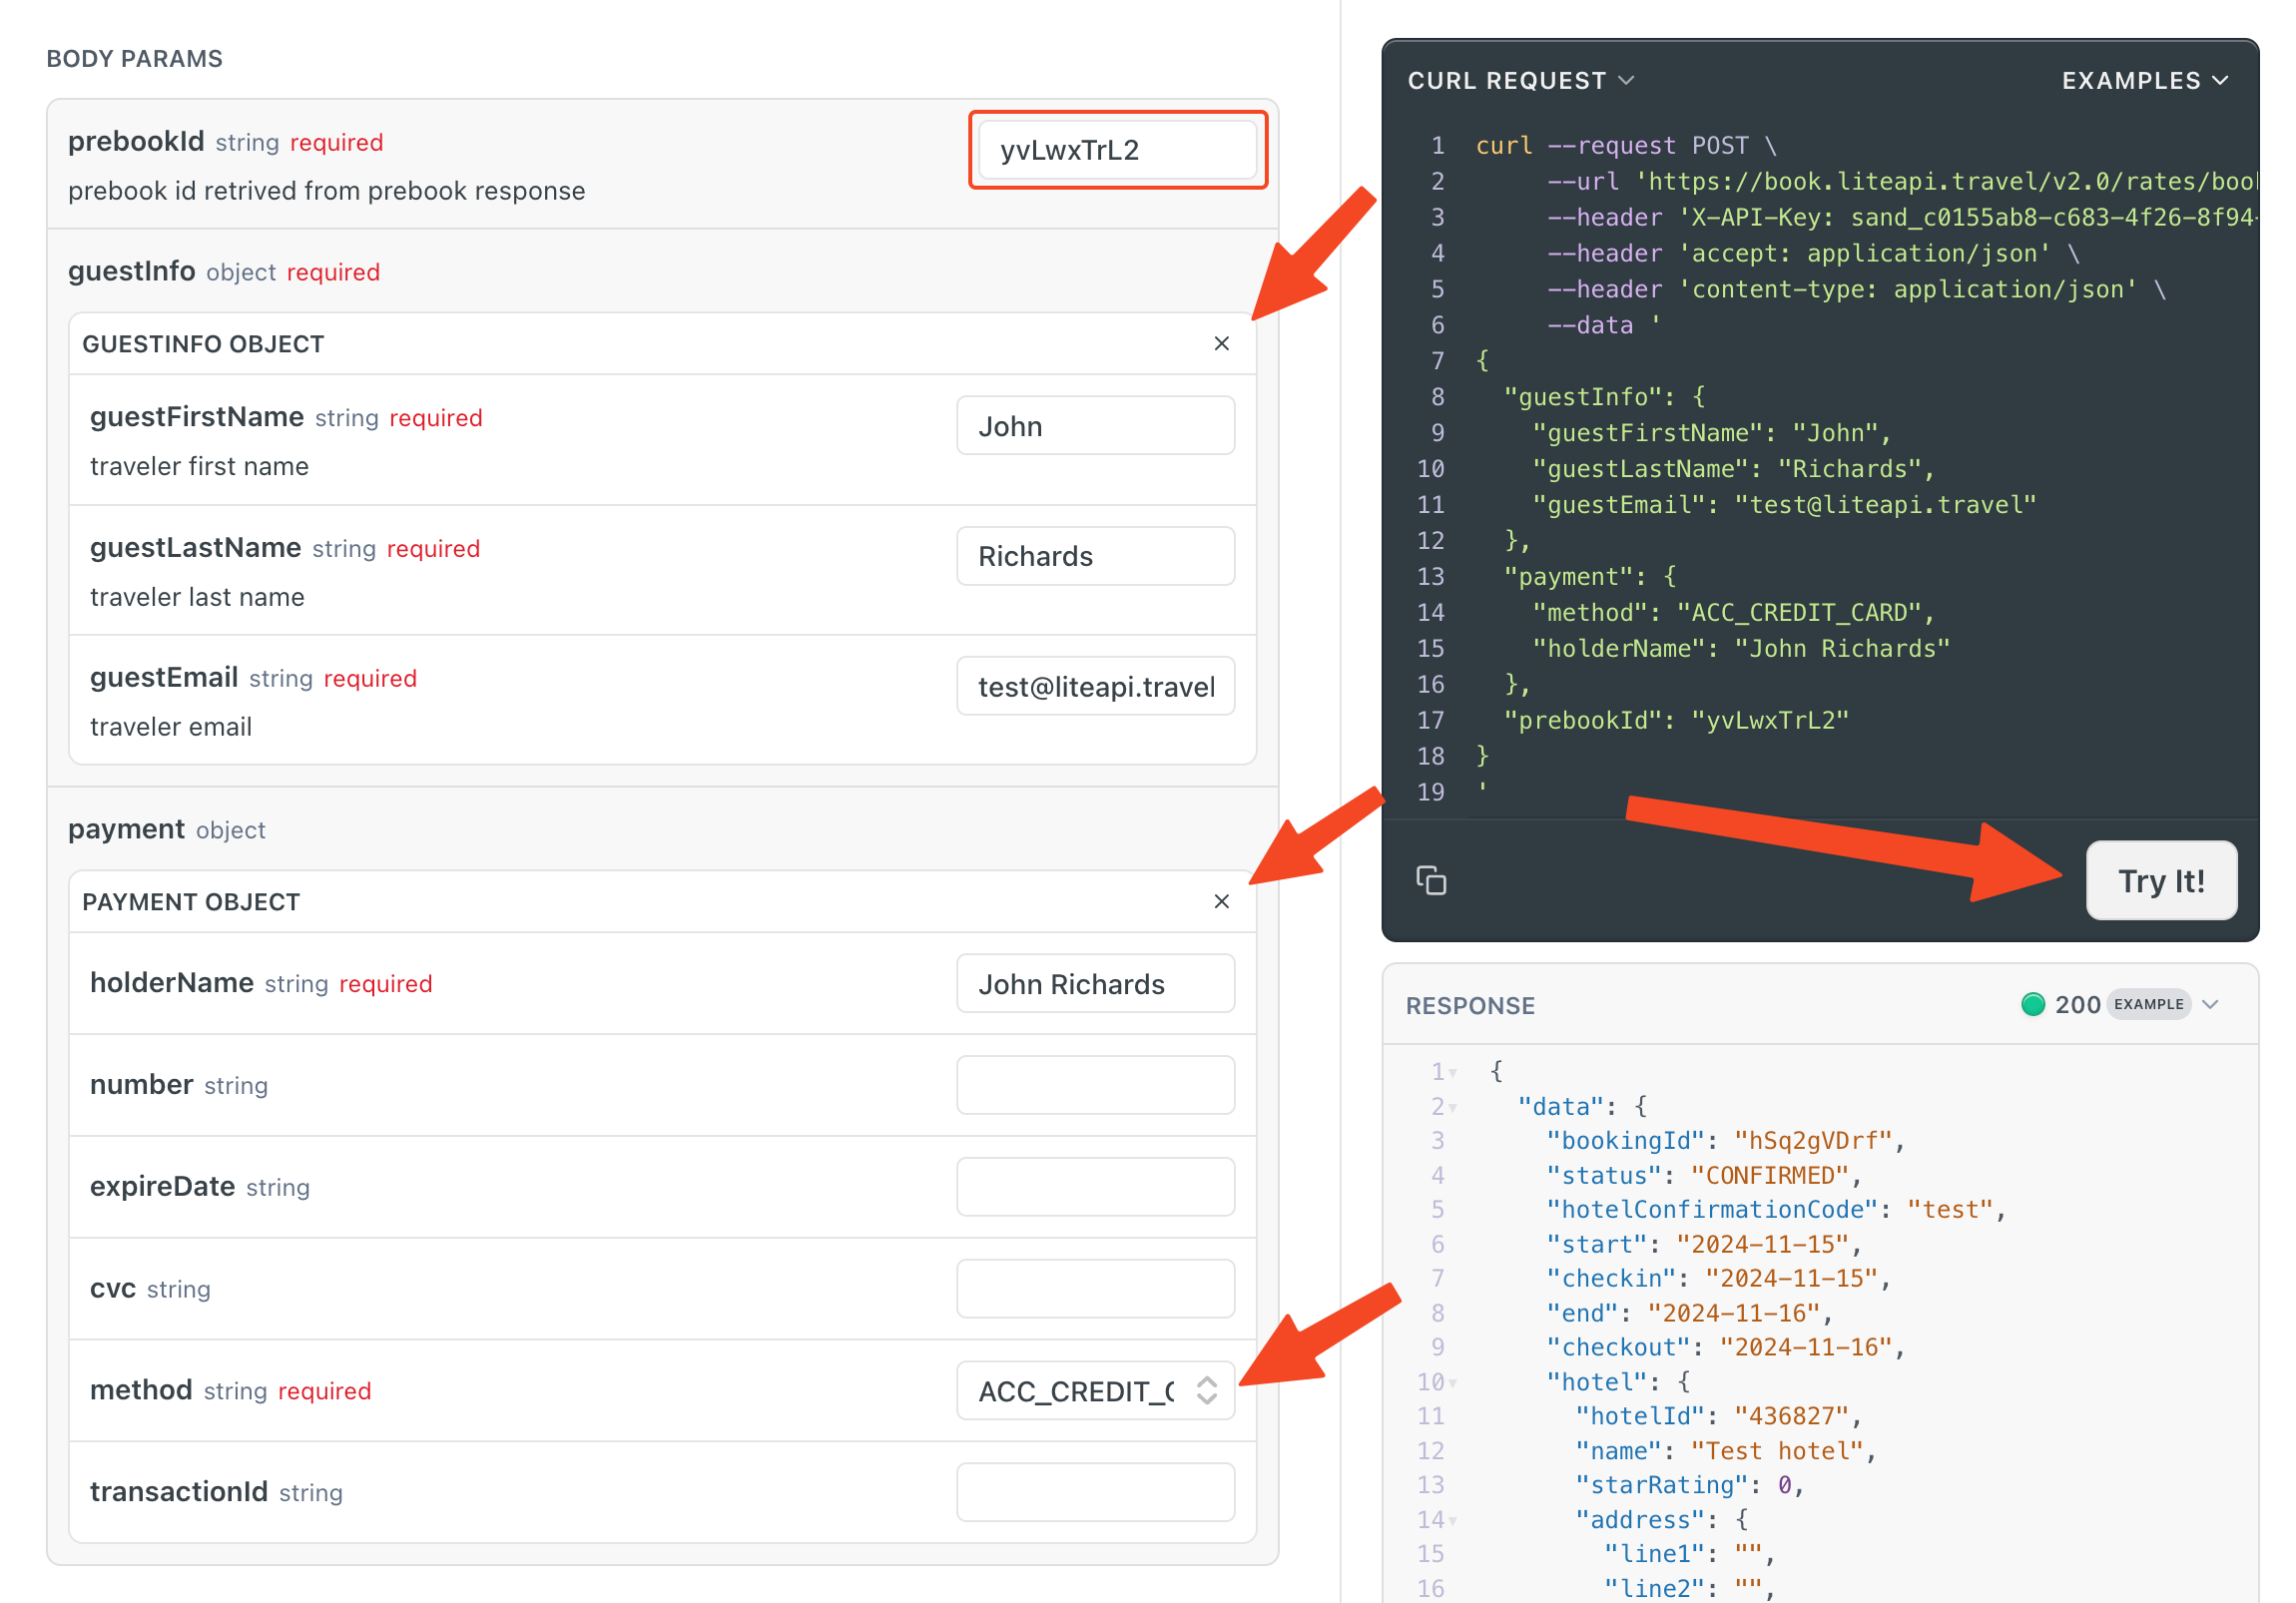
Start by pasting the prebookId from the pre-booking step into the prebookId field.
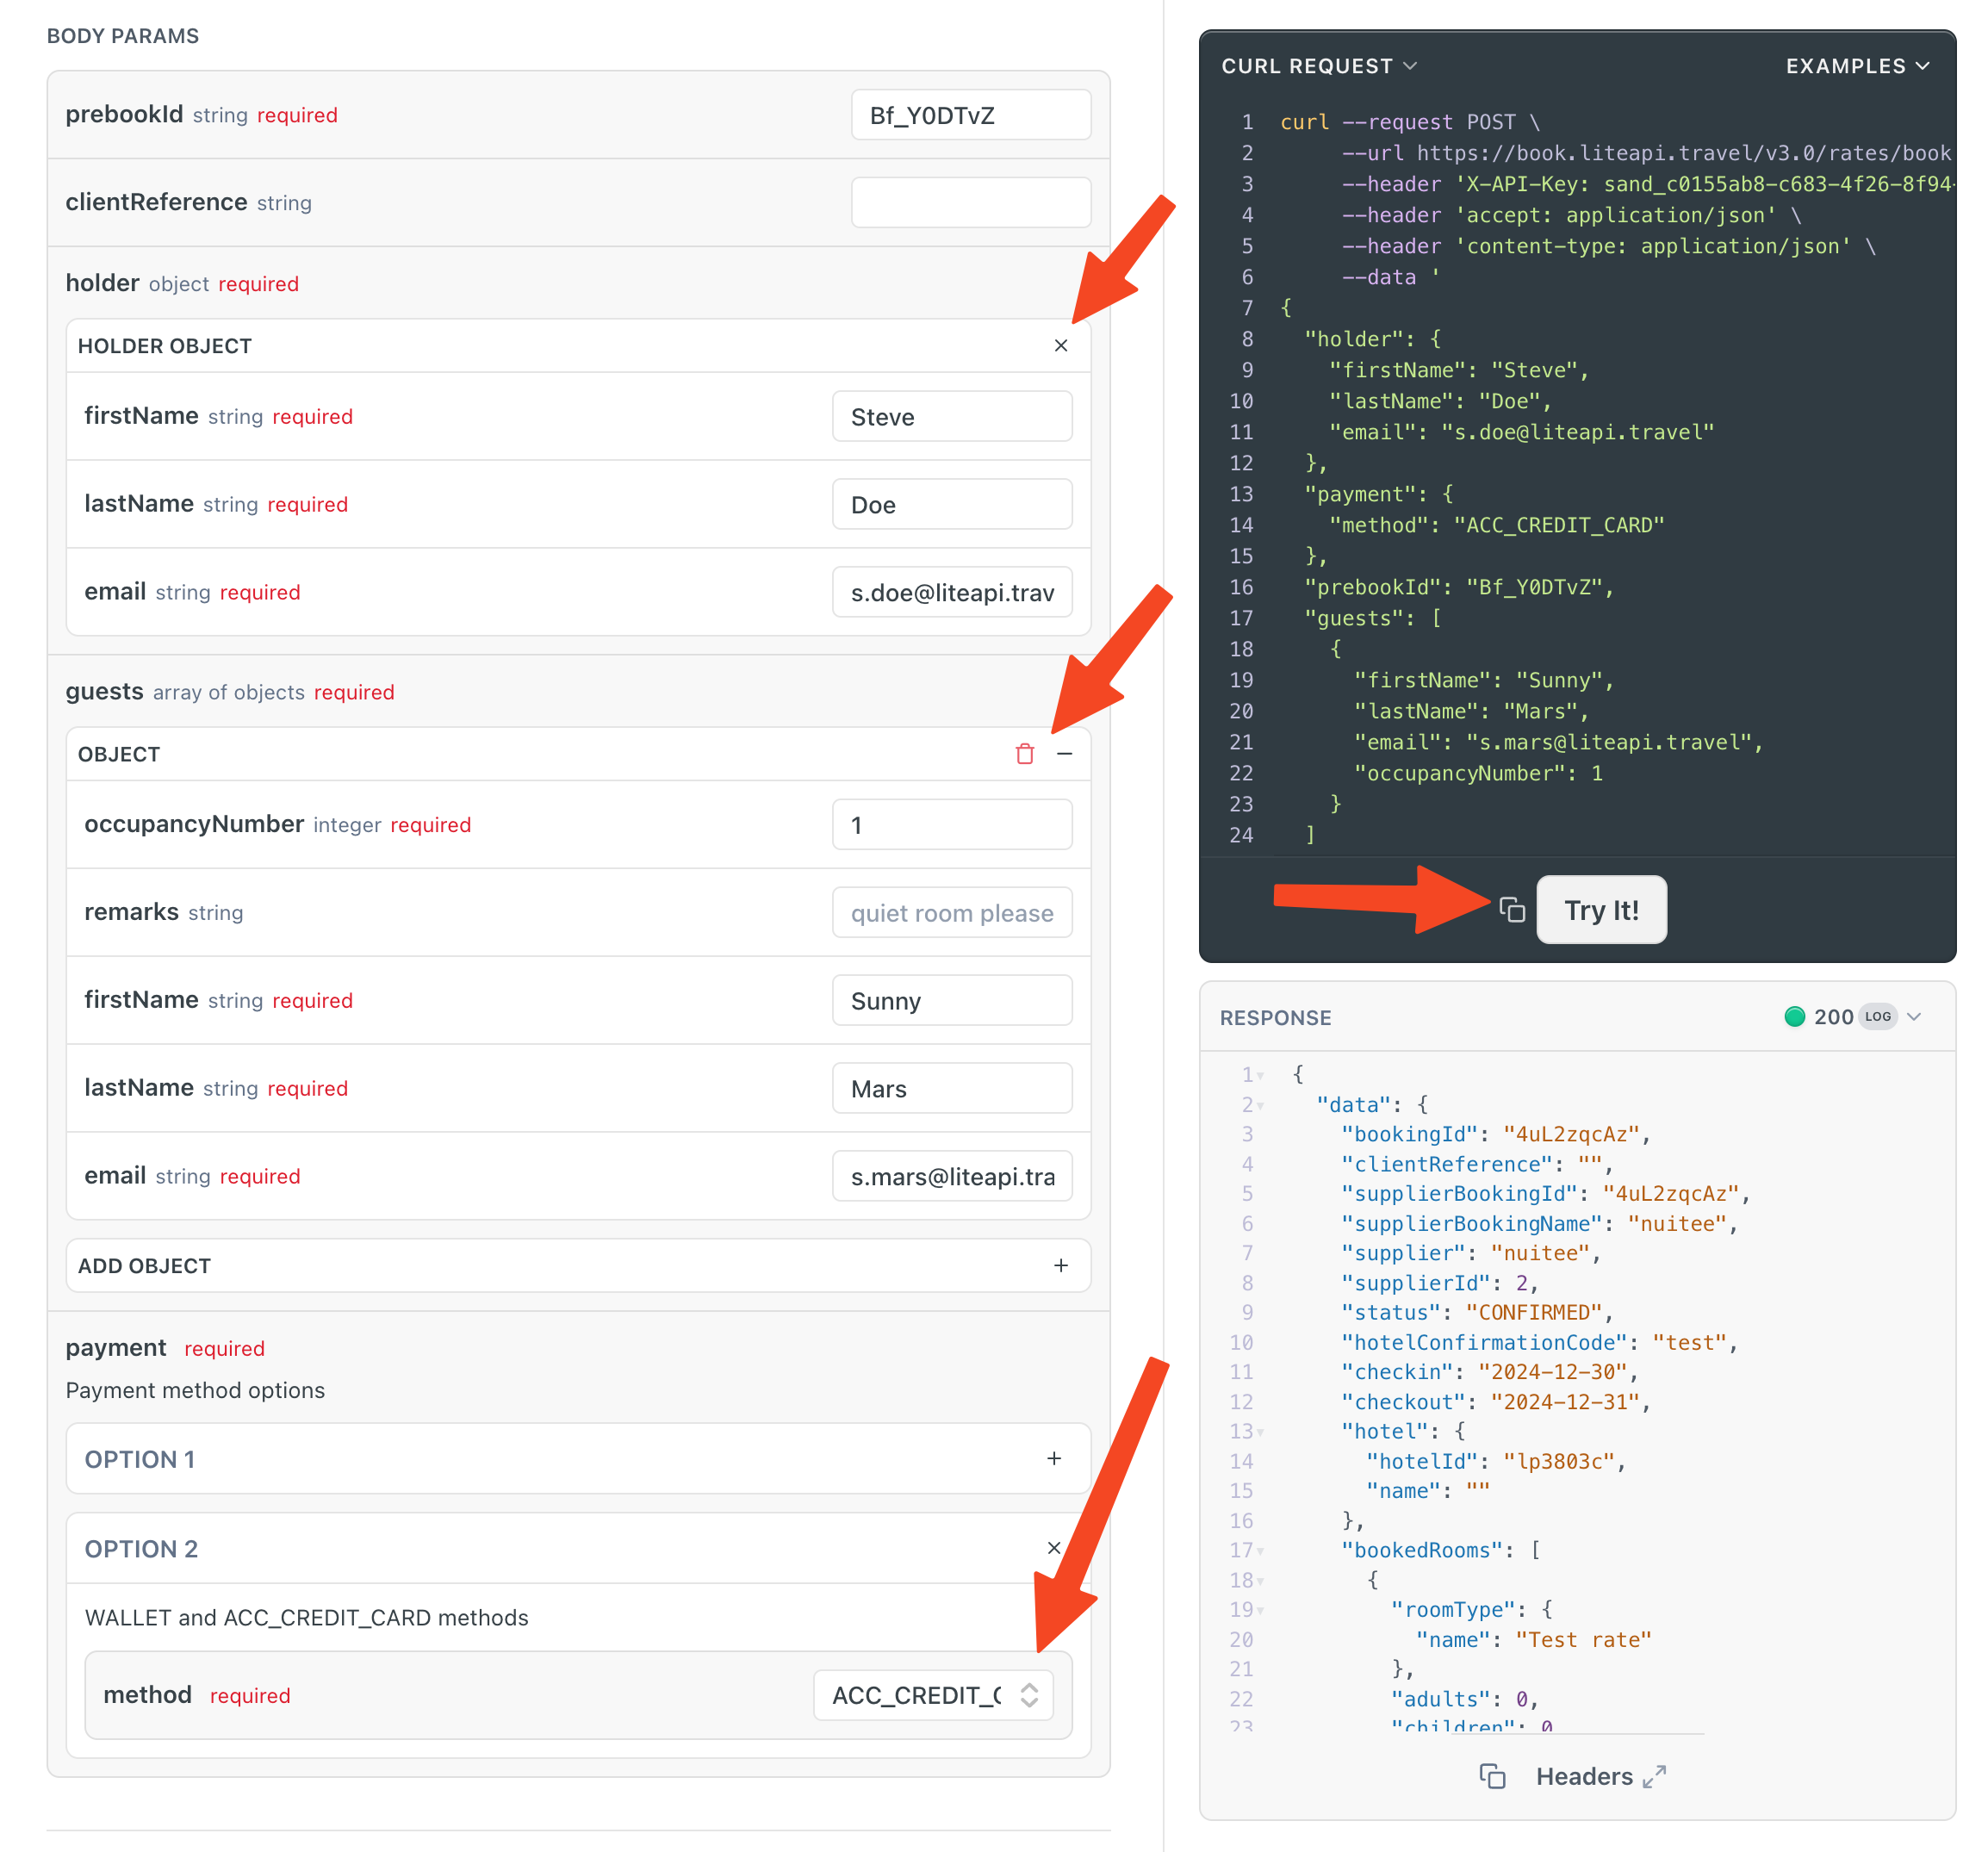
🌟 The clientReference field allows you to associate a booking in Nuitee Connect with a unique reference from your own system. This is especially useful for tracking and deduplication. It is not meant to be just the user’s ID, as it needs to be unique. If the same user submits the same booking request twice, this field helps us ensure that only one booking is accepted. You can leave it blank.
Next, the three fields in the holder object record information about the person booking the room. First name, last name, and email.
After that is the guests array of guest objects. This information is to record who will be staying in the room.
Finally, we need to add a payment method. For sandbox testing, the easiest way is to use the ACC_CREDIT_CARD method. This will simulate the payment method using a sandbox CC. For other payment options check out Implementing a Payment Method to understand when and how to use the different payment options.
Press "Try It!" to fire off the API request.
If successful, you will get a 200 response verifying the room has been booked.
Congratulations!
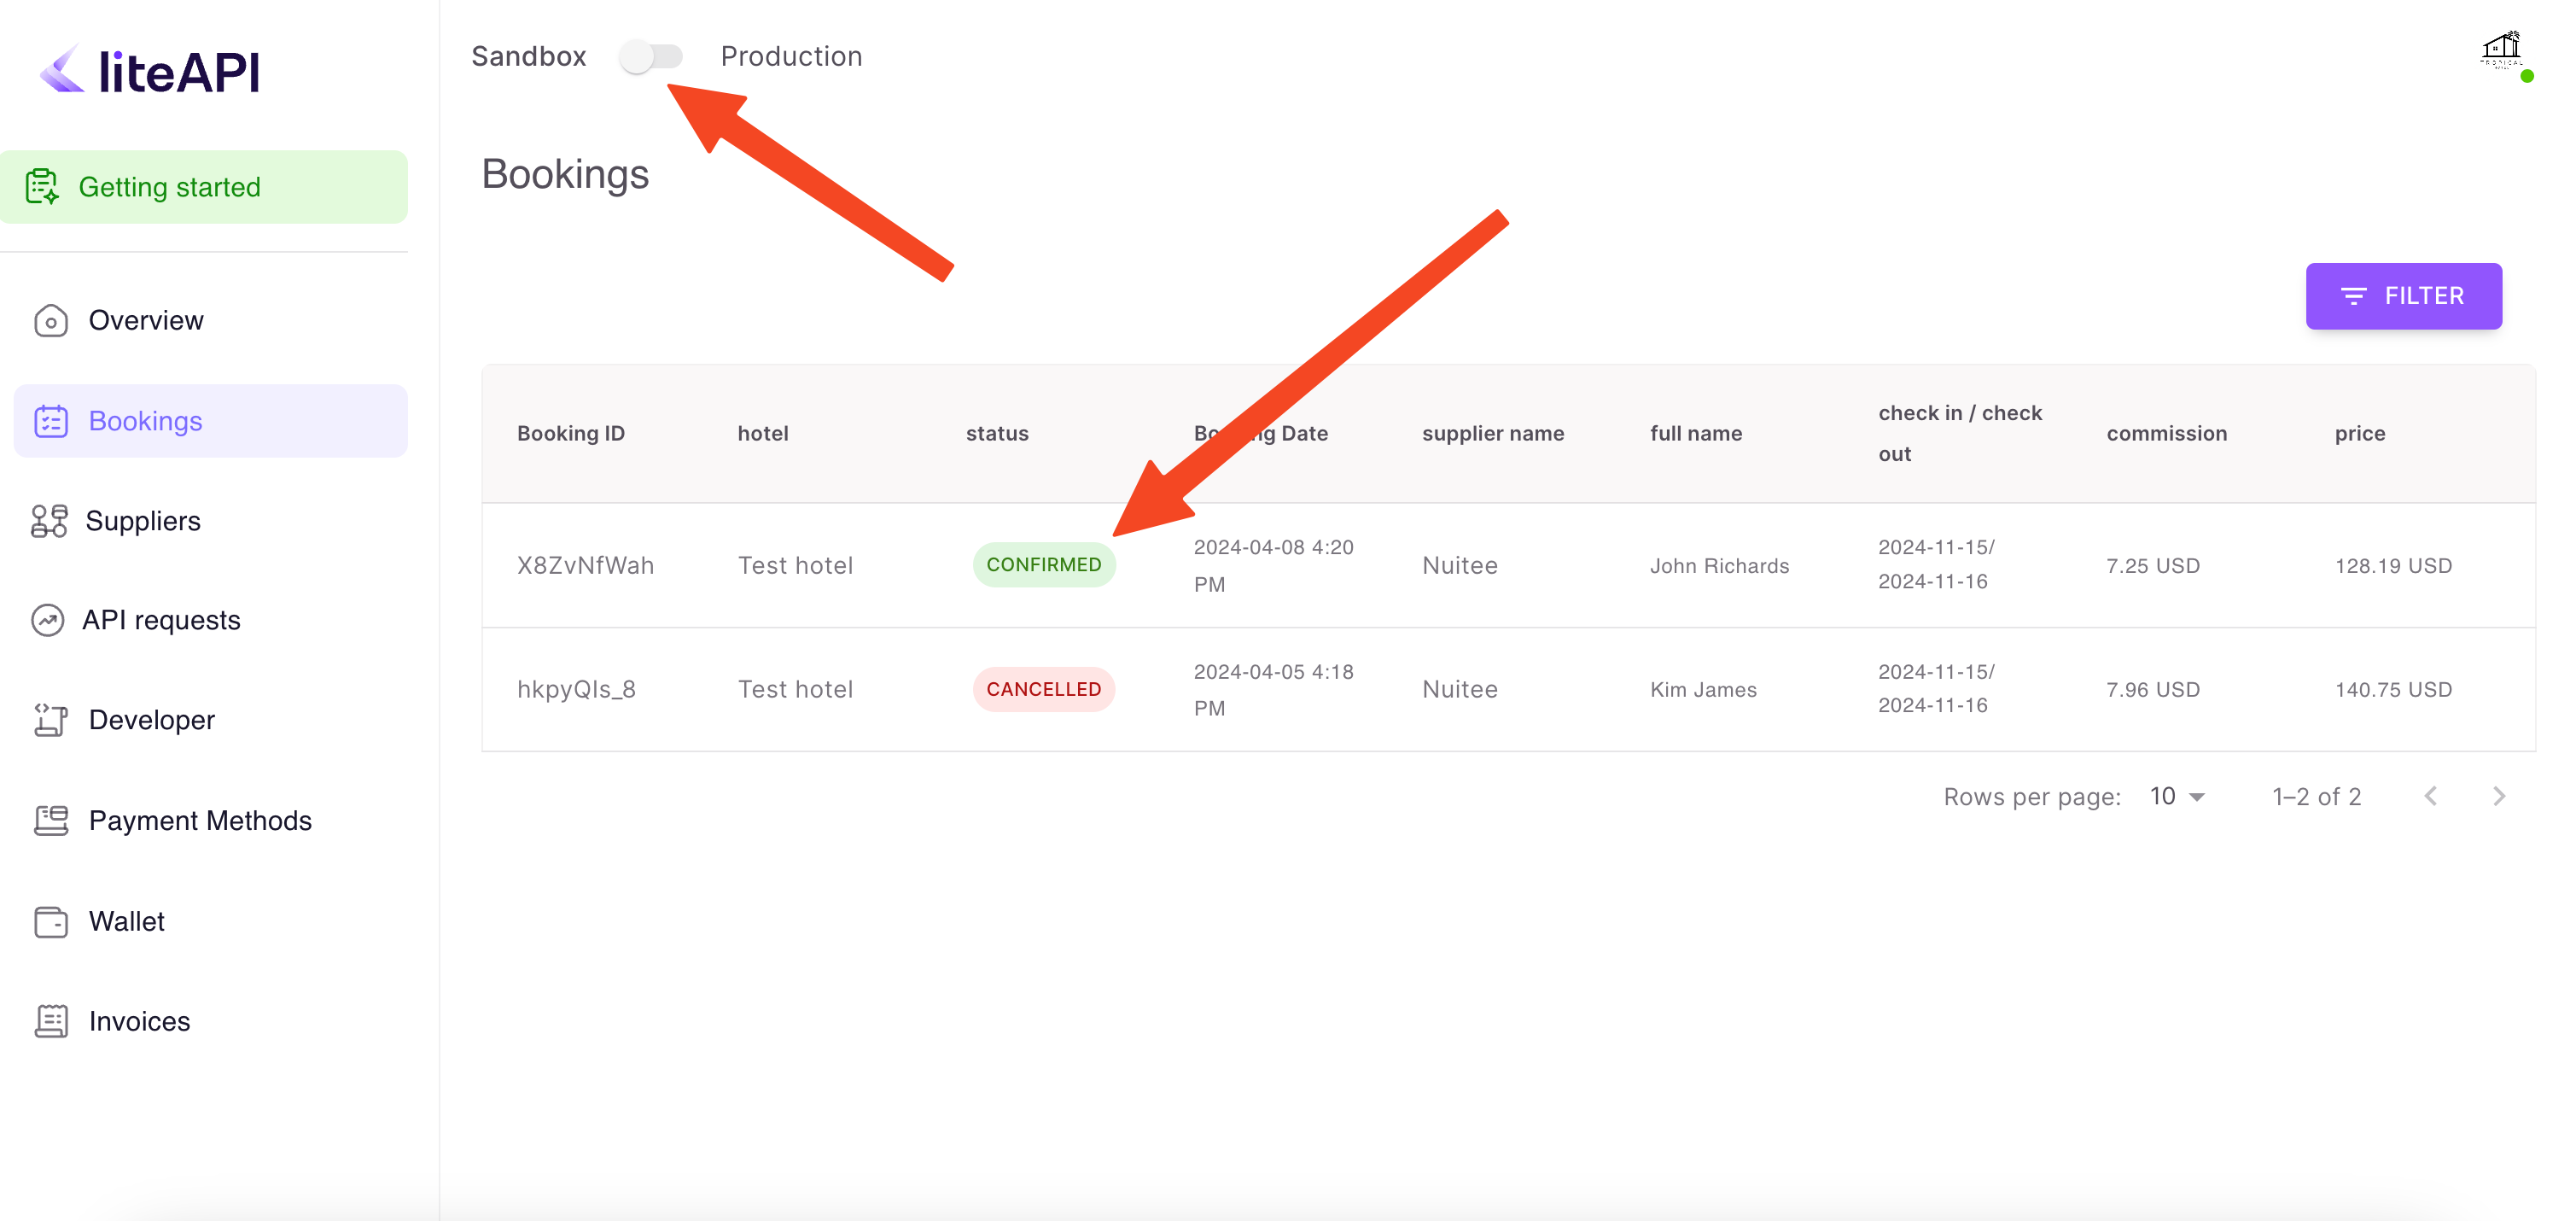
You can view the room booking by logging into the Nuitee Connect dashboard and navigating to Bookings in the sidebar. Most of the dashboard information is defined by if you are in Sandbox or Production mode, ensure the toggle is set to match the API Key used to book the room. There, you should see a listing of all your bookings, including the one just made.
If you run into any problems or have questions, please let us know via our Community Discord. We would be happy to help.
Updated about 1 month ago